Sunday, September 23, 2012

Sourdough Waffles: The King is Back

Andy and I make a batch of sourdough waffles or sourdough pancakes once a week from our NYC grown, Northampton transplanted sourdough starter.  We do this partially for starter care, to keep it in regular use by supplementing bread baking with breakfast foods, and partially because we are addicted to decadent and hearty breakfasts.

Here's what happened this morning...  Andy got out of bed before me (this almost never happens) and was antsy to whip up a waffle batter.  Since the usual sourdough waffle or pancake recipe comes straight from my head and my head was still half dreaming I told him to try the Sourdough Waffle recipe in King Arthur Flour Baker's Companion** as a jumping off point.

So now, the Pumpkin Queen has been reunited with The King (Arthur) on the UYS.

Andy didn't get too adventurous in his adaptation, only halving their recipe all except for the eggs.  The boy likes eggy waffles.

Sourdough Waffles
Adapted from King Arthur Flour Baker's Companion
Yields about 8 round seven-inch waffles

Sponge
1/2 cup all purpose flour
1/2 cup white whole wheat flour
1 tablespoon sugar
1 cup buttermilk (we used powdered buttermilk/water)
1/2 cup sourdough starter

Batter
2 large eggs
1/4 stick butter, unsalted and melted
1/4 teaspoon salt
1/2 teaspoon baking soda

Combine all the ingredients for the sponge and let it sit for as little as 5 minutes and as long as 8 hours.
Beat together the eggs, butter salt and baking soda.
Blend the batter mixture into the sponge.
Know your waffle iron and spray or butter it for the first waffle if it tends to get grabby.
Last nights homemade whipped cream (that topped KAF's Classic Pumpkin Pie)
turned into whipped butter this morning
Notes and Variations:
So, the waffle batter I typically throw together is a bit thicker than this one, my liquid to flour ratio is closer to the one we use for pancakes.  I noticed that with this thinner batter there is a fine line to walk in terms of filling the waffle iron.  It's a line well worth walking because the waffles turn out so perfect once you figure out exactly how much batter to add.  Just be aware, overfill and you get spill over, under fill and you get hole-y waffles.
Exhibit A
What I really love about this recipe, besides that is makes delicious, light waffles, is that you can let the sponge sit overnight if you've planned ahead for waffles, or "for whatever shorter time span is practical."  That's a big deal.

Some variations I plan to try in the future are supplementing a tablespoon of applesauce for half the butter and adding some ground flaxseed to the sponge.  And clearly I'm nuts for lots of fruit and nut combos.

I'm wa-full,
Sarah

**This book is one of the best gifts I've ever received.  I am so lucky to have great cousins to gift it to me.  Thanks!  If it's not on your bookshelf already I recommend you put it on your birthday/holiday wish lists and wedding registries ASAP.

Monday, September 10, 2012

The Pumpkin Queen Has Returned

Well it certainly has been a good long while since I've written a post here on the beloved UYS.  I think about it often, but between the two moves that I've made since Sar and I parted ways, the new job I've started, and my general laziness (le sigh), I've neglected to share with anyone the delicious things I've been cooking.

I would also like to admit that I don't bake nearly as much bread as I did when I was with Sar.  Its hard to keep up with bread-baking when you're the only bread-baker in the home.  It's much more of a team sport.

So what brought me back?  Pumpkin, obviously.  And the fact that I now have space for my KitchenAid in my new apartment!!!

{Queue the fireworks and celebratory brass band}
Now, as much as I loved to join Sar in a 15 minute kneading relay, there is something to be said for a beautiful stand-mixer that will do that for you.  I confess that many a delicious-looking bread recipe got passed over by me since leaving the Upper East Side because I didn't have the counter space or energy to be The Lone Kneader.  And now that I have granite countertops, crumbs tend to get lost in the dark/speckled surface and it freaks me out that I never have it clean enough.  I don't want to knead any errant crumbs or God-knows-what into my breads, now do I??  So the KitchenAid really just does the trick.  No messes or sore arms; only delicious baked goods.
So what did I bake this weekend?  Pumpkin Bagels! And holy cow are they good.  I used this recipe for Spiced Pumpkin Bagels from The Galley Gormet and made only the slightest alterations, so I'll share those here, but you'll need to follow Nicole's lovely post to get all of the deets. 

  • While I prefer adding the spices individually as her recipe calls for, I have a small container of Pumpkin Pie Spice that I'm trying to use up.  I replaced all of her spices with 2 teaspoons of Pumpkin Pie Spice, an extra dash of cinnamon because it's amazing, and also a dash of ground cloves because I feel like they belong there, too.
  • I used dark brown sugar instead of light because a) it's all I ever buy and b) I really like molasses so it just appeals to me more.  I think straight molasses would be too over-powering to add to the recipe, though.
  • I didn't do this, but will when I make the bagels again...add salt.  I think the recipe needs 1/2 to 1 teaspoon of salt added to balance the sweet flavors and add a little depth.  The OJ gives it a little something, but I missed the balance that salt brings to the table.
  • I added about 2-3 tablespoons of malted barley syrup to the water that I boiled the bagels in and I reduced their boil time to 1 minute per side because I was lazy and also because I've read that 1 minute is about all you need.  I don't feel too strongly on that timing either way, for the record. Do as you please :)

Take a look at these beauties!
The bagels smell just like fall and had that perfect crunchy outside and completely soft and chewy inside.  That's bagel heaven, right there.
So Sar and I had a good long chat and I think we're going to try to keep up with this blog better.  And we also plan on adding posts about the other non-yeasted foods that we cook...both baked and otherwise.  We're not going to change the name, though, because it's too clever to give up.  Here's to The Upper Yeast Side and beyond!
XOXO,
Lil


Thursday, March 29, 2012

Returning Reinhart


So, tomorrow I will return Reinhart's Artisan Breads Everday.  I tried to renew it but it is on hold and library late fees are embarrassing.  I ended up making two different loaves from his book.  The first was his version of San Francisco Sourdough.  He offers an option (not "purist") where you add in instant yeast.  It was superb.  

Sourdough starter

Mixed dough

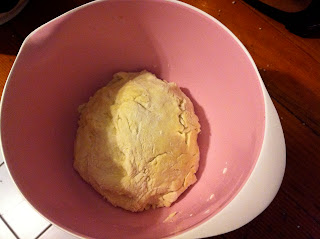
Kneaded dough
 The nice part about it (for a household of two, especially) is that you can divide the dough in half and cook part that day and the other part up to three days later.
half to rest in the fridge

half to rise at room temp


I would be lying if I said I did everything according to his recipe.  We were almost out of bread flour so I used 1 1/2 cups white whole wheat, 2 1/2 cups all purpose flour and 4 T vital wheat gluten.  I ended up kneading the dough with about 1/4 cup of whole wheat flour.  The other ingredients were just water, salt, instant yeast, and of course, 1/4 cup of mother starter mixed with 1 3/4 cups bread flour and just over 1/2 cup of water.  That initial starter ferments overnight (6-8 hours) before combining it with the other ingredients to form the final dough.  I hadn't ever used bread flour for the starter before.  I was thinking that's what made this bread so phenomenal...  

Then, I tried his Pain au Levain.  Oh my god.  Oh mon dieu!  And ay dios mio too.  The Pain au Levain also called for bread flour (which we restocked) and whole wheat (also restocked).  I don't have a single photograph to share because this bread was eaten with soups and as toast and made into sandwiches with unprecedented speed.  It was gone within days.  It was amazing.  Absolutely amazing.  I did the same drill of halving the dough and baking some on the first day and retarding the other half.  The other halves definitely have a more developed taste than their younger versions but the texture of the bread seems to suffer from the prolonged rising period.  While eating his first slice of Pain au Levain Andy announced, "This is bread.  Wow."  And decided we could enter it in some sort of bread baking contest, if there ever was such a thing.  (I am sure there is).  This cookbook is officially on my wish list.

Now for another 8PM bedtime.  I miss my appendix.
-S 


Saturday, March 10, 2012

The Library: March comes in like a lion and out like an appendix

Today I walked to the library.

This might not seem like a huge feat since the library is all of 3/4 mile from home and it's, well, the library. But I had an appendectomy on Sunday night and this was my greatest venture out into the world since surgery.  I picked up three books: Peter Reinhart's Artisan Bread Everyday, Ree Drummond's The Pioneer Woman Cooks, and Tracy Kidder's Home Town.


Perusing Ree Drummond's book prompted two actions.  The first was a shopping list for a vegetarian version of her pot pie.  Andy is at the store fulfilling the ingredients list as I type.  The second action is this - me typing a blog post after a long, long hiatus!  Although blog posts have been few and far between, rest assured that I have been baking bread and LOTS of sourdough pancakes.  I know Lil has baked at least a few loaves in her many cooking endeavors.  No longer in the quaint and cozy Upper East Side tenement building we called home for two years, we both lost the lust for bread blogging, definitely not baking/cooking though.  Unfortunately, I had to lose my appendix to remember how fun this blog was... but here I am, sitting up and typing a return-to-blogging-post!

Like I mentioned, sourdough pancakes are a regular weekly treat.  I also got in the habit of baking something I, very creatively, named "Northamfrancisco Sourdough" inspired from a Bread Alone by Daniel Leader and Judith Blahnik recipe for San Francisco Sourdough.  I don't have any photos of it today but I have baked at least a dozen loaves/variations of this recipe.


Northamfrancisco Sourdough
Recipe inspiration from Bread Alone
Yields two loaves

Established sourdough starter
Water
Oil
1 1/2 cups All-purpose flour (and more for kneading)
3 cups bread flour
2 cups rye flour OR 2 cups whole wheat flour
2 tablespoons ground flax seeds
1 tablespoons sea salt
caraway seeds or rosemary (optional, but why not!?)

Start the poolish by combining 2/3 cup starter, 1 cup water, and 1 1/2 cups all-purpose flour.  If you have a scale (like Lily), 8 ounces of each.
Allow the poolish to ferment, covered for 24 hours.
For the final dough, combine 3 cups bread flour, 2 cups rye/whole wheat flour, 2 tablespoons ground flax seeds, 1 tablespoon sea salt, and caraway seeds or rosemary to your liking
Combine the poolish with the dry contents of the large mixing bowl.  A lot depends on the consistency of your starter, but you will likely need to add water (room temperature) here to create the final dough.
Once your dough is impossible to stir, place it on a floured countertop and get kneading!  16 minutes!  "The dough is ready when a little dough pulled from the mass springs back quickly."
Shape the dough into a ball and place it into an oiled, large bowl.  Turn once to coat with oil.  Ferment the dough for 2 1/2 hours until doubled in volume.
Deflate and transfer the dough to a floured surface to rest for 30 minutes.  Honestly, I sometimes skip this step if I am impatient.  The Bread Alone recipe actually does this twice.  That's an hour more wait time for bread!
After 30 minutes, or an hour, or no time at all, divide the dough into two long torpedoes.  "The torpedo is the classic San Francisco sourdough shape."  If you prefer to be rebellious, shape the dough into boules.
Proof the loaves for 1 hour (until they are 1-1/2 times increased in volume), covered with a clean, damp cloth or plastic wrap.
Preheat the oven to 450 degrees.  Before baking, spritz the loaves with water and add more rosemary/caraway seeds on top.
Bake the loaves for 15 minutes, decrease the oven temperature to 425 and bake an another 15 to 20 minutes.  Total bake time will be about 35-45 minutes.
Try to cool completely on a wire rack before tasting.  I have never been able to wait...


So, besides blogging, I actually started a loaf from Artisan Breads Everyday - it's Reinhart's version of San Francisco sourdough bread.  It's just a baby "wild yeast starter" now (aka poolish) but in 6 to 8 hours it will be bigger!


Here's the sourdough mama, happy and farting little "hello" bubbles to you, Lil.


Your turn,
XO S

PS No pressure.  If nothing else becomes of this attempt at re-energizing the bread blog, I now have recorded instructions for that Northamfrancisco bread in a safer place than a yellow post-it!

Sunday, May 8, 2011

Sourdough Pancakes III

On my long weekends of yoga school there is no breakfast quite as filling and delicious as Sourdough Pancakes.  I have been using (and tweeking) the same day recipe that I made last April.

I am not going to re-type the recipe here (just follow the link) but here are some more specifics I have learned from making these pancakes many times:

  • Consistency of starter: The starter can be fed just before making these pancakes with the appropriate amount of water-to-flour ratio so that the batch looks like thick pancake batter.  I wish I had a more scientific measurement technique for you at this point.  If you are familiar with pancakes, this should be simple.  Just go with your gut instinct.
  • Yield: Depending on the hydration of your starter you'll get between 9-12 pancakes 3 inch in diameter pancakes.  I'd guesstimate that I use 1/8 of a cup of batter for each pancake.  Again, nothing too technical. 
  • Buttermilk: One morning, because I am more of a mad scientist than a baker, I threw in a tablespoon of SACO Cultured Buttermilk.  It's basically powdered buttermilk.  It made the whole batter bubble and bubble and the pancakes were so airy they were practically transparent!  Since then I have been using 1/2 a tablespoon in the recipe and it gives the pancakes a light, fluffiness while maintaining their opacity.

Happy Mother's Day,
Sarah