Sunday, September 23, 2012

Sourdough Waffles: The King is Back

Andy and I make a batch of sourdough waffles or sourdough pancakes once a week from our NYC grown, Northampton transplanted sourdough starter.  We do this partially for starter care, to keep it in regular use by supplementing bread baking with breakfast foods, and partially because we are addicted to decadent and hearty breakfasts.

Here's what happened this morning...  Andy got out of bed before me (this almost never happens) and was antsy to whip up a waffle batter.  Since the usual sourdough waffle or pancake recipe comes straight from my head and my head was still half dreaming I told him to try the Sourdough Waffle recipe in King Arthur Flour Baker's Companion** as a jumping off point.

So now, the Pumpkin Queen has been reunited with The King (Arthur) on the UYS.

Andy didn't get too adventurous in his adaptation, only halving their recipe all except for the eggs.  The boy likes eggy waffles.

Sourdough Waffles
Adapted from King Arthur Flour Baker's Companion
Yields about 8 round seven-inch waffles

Sponge
1/2 cup all purpose flour
1/2 cup white whole wheat flour
1 tablespoon sugar
1 cup buttermilk (we used powdered buttermilk/water)
1/2 cup sourdough starter

Batter
2 large eggs
1/4 stick butter, unsalted and melted
1/4 teaspoon salt
1/2 teaspoon baking soda

Combine all the ingredients for the sponge and let it sit for as little as 5 minutes and as long as 8 hours.
Beat together the eggs, butter salt and baking soda.
Blend the batter mixture into the sponge.
Know your waffle iron and spray or butter it for the first waffle if it tends to get grabby.
Last nights homemade whipped cream (that topped KAF's Classic Pumpkin Pie)
turned into whipped butter this morning
Notes and Variations:
So, the waffle batter I typically throw together is a bit thicker than this one, my liquid to flour ratio is closer to the one we use for pancakes.  I noticed that with this thinner batter there is a fine line to walk in terms of filling the waffle iron.  It's a line well worth walking because the waffles turn out so perfect once you figure out exactly how much batter to add.  Just be aware, overfill and you get spill over, under fill and you get hole-y waffles.
Exhibit A
What I really love about this recipe, besides that is makes delicious, light waffles, is that you can let the sponge sit overnight if you've planned ahead for waffles, or "for whatever shorter time span is practical."  That's a big deal.

Some variations I plan to try in the future are supplementing a tablespoon of applesauce for half the butter and adding some ground flaxseed to the sponge.  And clearly I'm nuts for lots of fruit and nut combos.

I'm wa-full,
Sarah

**This book is one of the best gifts I've ever received.  I am so lucky to have great cousins to gift it to me.  Thanks!  If it's not on your bookshelf already I recommend you put it on your birthday/holiday wish lists and wedding registries ASAP.

Monday, September 10, 2012

The Pumpkin Queen Has Returned

Well it certainly has been a good long while since I've written a post here on the beloved UYS.  I think about it often, but between the two moves that I've made since Sar and I parted ways, the new job I've started, and my general laziness (le sigh), I've neglected to share with anyone the delicious things I've been cooking.

I would also like to admit that I don't bake nearly as much bread as I did when I was with Sar.  Its hard to keep up with bread-baking when you're the only bread-baker in the home.  It's much more of a team sport.

So what brought me back?  Pumpkin, obviously.  And the fact that I now have space for my KitchenAid in my new apartment!!!

{Queue the fireworks and celebratory brass band}
Now, as much as I loved to join Sar in a 15 minute kneading relay, there is something to be said for a beautiful stand-mixer that will do that for you.  I confess that many a delicious-looking bread recipe got passed over by me since leaving the Upper East Side because I didn't have the counter space or energy to be The Lone Kneader.  And now that I have granite countertops, crumbs tend to get lost in the dark/speckled surface and it freaks me out that I never have it clean enough.  I don't want to knead any errant crumbs or God-knows-what into my breads, now do I??  So the KitchenAid really just does the trick.  No messes or sore arms; only delicious baked goods.
So what did I bake this weekend?  Pumpkin Bagels! And holy cow are they good.  I used this recipe for Spiced Pumpkin Bagels from The Galley Gormet and made only the slightest alterations, so I'll share those here, but you'll need to follow Nicole's lovely post to get all of the deets. 

  • While I prefer adding the spices individually as her recipe calls for, I have a small container of Pumpkin Pie Spice that I'm trying to use up.  I replaced all of her spices with 2 teaspoons of Pumpkin Pie Spice, an extra dash of cinnamon because it's amazing, and also a dash of ground cloves because I feel like they belong there, too.
  • I used dark brown sugar instead of light because a) it's all I ever buy and b) I really like molasses so it just appeals to me more.  I think straight molasses would be too over-powering to add to the recipe, though.
  • I didn't do this, but will when I make the bagels again...add salt.  I think the recipe needs 1/2 to 1 teaspoon of salt added to balance the sweet flavors and add a little depth.  The OJ gives it a little something, but I missed the balance that salt brings to the table.
  • I added about 2-3 tablespoons of malted barley syrup to the water that I boiled the bagels in and I reduced their boil time to 1 minute per side because I was lazy and also because I've read that 1 minute is about all you need.  I don't feel too strongly on that timing either way, for the record. Do as you please :)

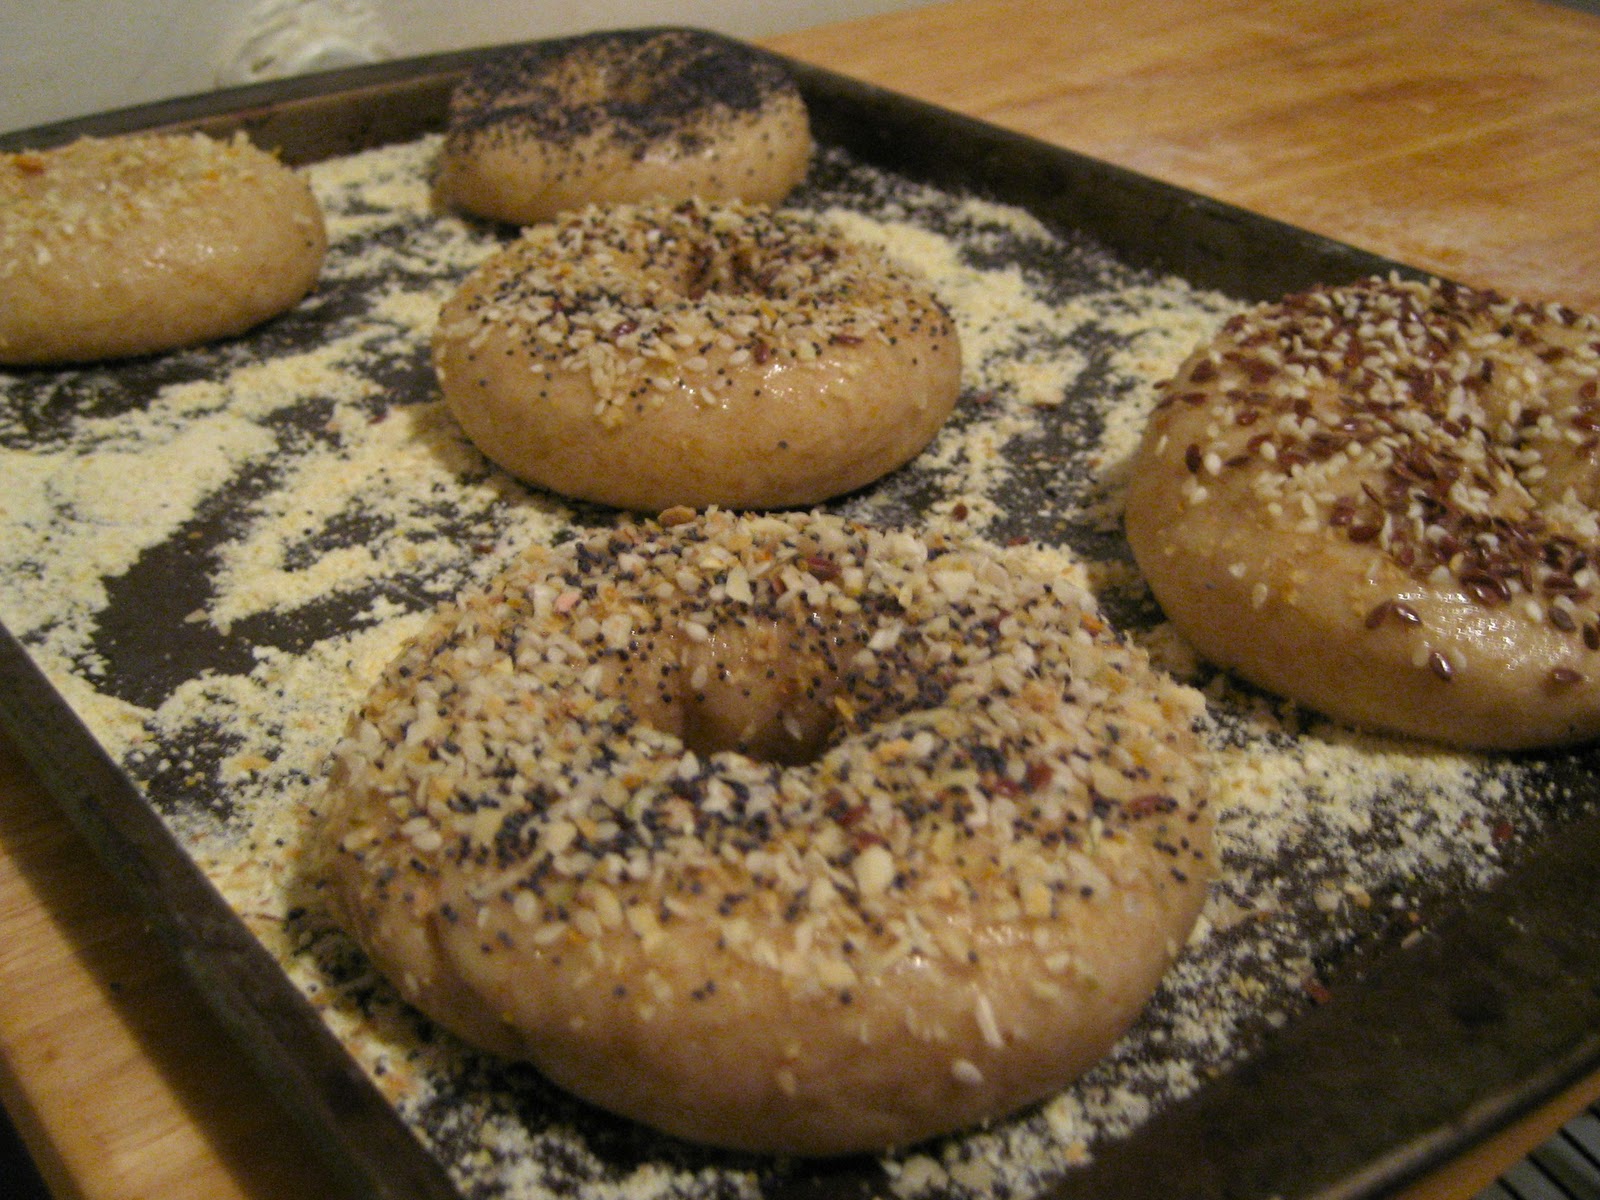
Take a look at these beauties!
The bagels smell just like fall and had that perfect crunchy outside and completely soft and chewy inside.  That's bagel heaven, right there.
So Sar and I had a good long chat and I think we're going to try to keep up with this blog better.  And we also plan on adding posts about the other non-yeasted foods that we cook...both baked and otherwise.  We're not going to change the name, though, because it's too clever to give up.  Here's to The Upper Yeast Side and beyond!
XOXO,
Lil


Thursday, March 29, 2012

Returning Reinhart


So, tomorrow I will return Reinhart's Artisan Breads Everday.  I tried to renew it but it is on hold and library late fees are embarrassing.  I ended up making two different loaves from his book.  The first was his version of San Francisco Sourdough.  He offers an option (not "purist") where you add in instant yeast.  It was superb.  

Sourdough starter

Mixed dough

Kneaded dough
 The nice part about it (for a household of two, especially) is that you can divide the dough in half and cook part that day and the other part up to three days later.
half to rest in the fridge

half to rise at room temp


I would be lying if I said I did everything according to his recipe.  We were almost out of bread flour so I used 1 1/2 cups white whole wheat, 2 1/2 cups all purpose flour and 4 T vital wheat gluten.  I ended up kneading the dough with about 1/4 cup of whole wheat flour.  The other ingredients were just water, salt, instant yeast, and of course, 1/4 cup of mother starter mixed with 1 3/4 cups bread flour and just over 1/2 cup of water.  That initial starter ferments overnight (6-8 hours) before combining it with the other ingredients to form the final dough.  I hadn't ever used bread flour for the starter before.  I was thinking that's what made this bread so phenomenal...  

Then, I tried his Pain au Levain.  Oh my god.  Oh mon dieu!  And ay dios mio too.  The Pain au Levain also called for bread flour (which we restocked) and whole wheat (also restocked).  I don't have a single photograph to share because this bread was eaten with soups and as toast and made into sandwiches with unprecedented speed.  It was gone within days.  It was amazing.  Absolutely amazing.  I did the same drill of halving the dough and baking some on the first day and retarding the other half.  The other halves definitely have a more developed taste than their younger versions but the texture of the bread seems to suffer from the prolonged rising period.  While eating his first slice of Pain au Levain Andy announced, "This is bread.  Wow."  And decided we could enter it in some sort of bread baking contest, if there ever was such a thing.  (I am sure there is).  This cookbook is officially on my wish list.

Now for another 8PM bedtime.  I miss my appendix.
-S 


Saturday, March 10, 2012

The Library: March comes in like a lion and out like an appendix

Today I walked to the library.

This might not seem like a huge feat since the library is all of 3/4 mile from home and it's, well, the library. But I had an appendectomy on Sunday night and this was my greatest venture out into the world since surgery.  I picked up three books: Peter Reinhart's Artisan Bread Everyday, Ree Drummond's The Pioneer Woman Cooks, and Tracy Kidder's Home Town.


Perusing Ree Drummond's book prompted two actions.  The first was a shopping list for a vegetarian version of her pot pie.  Andy is at the store fulfilling the ingredients list as I type.  The second action is this - me typing a blog post after a long, long hiatus!  Although blog posts have been few and far between, rest assured that I have been baking bread and LOTS of sourdough pancakes.  I know Lil has baked at least a few loaves in her many cooking endeavors.  No longer in the quaint and cozy Upper East Side tenement building we called home for two years, we both lost the lust for bread blogging, definitely not baking/cooking though.  Unfortunately, I had to lose my appendix to remember how fun this blog was... but here I am, sitting up and typing a return-to-blogging-post!

Like I mentioned, sourdough pancakes are a regular weekly treat.  I also got in the habit of baking something I, very creatively, named "Northamfrancisco Sourdough" inspired from a Bread Alone by Daniel Leader and Judith Blahnik recipe for San Francisco Sourdough.  I don't have any photos of it today but I have baked at least a dozen loaves/variations of this recipe.


Northamfrancisco Sourdough
Recipe inspiration from Bread Alone
Yields two loaves

Established sourdough starter
Water
Oil
1 1/2 cups All-purpose flour (and more for kneading)
3 cups bread flour
2 cups rye flour OR 2 cups whole wheat flour
2 tablespoons ground flax seeds
1 tablespoons sea salt
caraway seeds or rosemary (optional, but why not!?)

Start the poolish by combining 2/3 cup starter, 1 cup water, and 1 1/2 cups all-purpose flour.  If you have a scale (like Lily), 8 ounces of each.
Allow the poolish to ferment, covered for 24 hours.
For the final dough, combine 3 cups bread flour, 2 cups rye/whole wheat flour, 2 tablespoons ground flax seeds, 1 tablespoon sea salt, and caraway seeds or rosemary to your liking
Combine the poolish with the dry contents of the large mixing bowl.  A lot depends on the consistency of your starter, but you will likely need to add water (room temperature) here to create the final dough.
Once your dough is impossible to stir, place it on a floured countertop and get kneading!  16 minutes!  "The dough is ready when a little dough pulled from the mass springs back quickly."
Shape the dough into a ball and place it into an oiled, large bowl.  Turn once to coat with oil.  Ferment the dough for 2 1/2 hours until doubled in volume.
Deflate and transfer the dough to a floured surface to rest for 30 minutes.  Honestly, I sometimes skip this step if I am impatient.  The Bread Alone recipe actually does this twice.  That's an hour more wait time for bread!
After 30 minutes, or an hour, or no time at all, divide the dough into two long torpedoes.  "The torpedo is the classic San Francisco sourdough shape."  If you prefer to be rebellious, shape the dough into boules.
Proof the loaves for 1 hour (until they are 1-1/2 times increased in volume), covered with a clean, damp cloth or plastic wrap.
Preheat the oven to 450 degrees.  Before baking, spritz the loaves with water and add more rosemary/caraway seeds on top.
Bake the loaves for 15 minutes, decrease the oven temperature to 425 and bake an another 15 to 20 minutes.  Total bake time will be about 35-45 minutes.
Try to cool completely on a wire rack before tasting.  I have never been able to wait...


So, besides blogging, I actually started a loaf from Artisan Breads Everyday - it's Reinhart's version of San Francisco sourdough bread.  It's just a baby "wild yeast starter" now (aka poolish) but in 6 to 8 hours it will be bigger!


Here's the sourdough mama, happy and farting little "hello" bubbles to you, Lil.


Your turn,
XO S

PS No pressure.  If nothing else becomes of this attempt at re-energizing the bread blog, I now have recorded instructions for that Northamfrancisco bread in a safer place than a yellow post-it!

Sunday, May 8, 2011

Sourdough Pancakes III

On my long weekends of yoga school there is no breakfast quite as filling and delicious as Sourdough Pancakes.  I have been using (and tweeking) the same day recipe that I made last April.

I am not going to re-type the recipe here (just follow the link) but here are some more specifics I have learned from making these pancakes many times:

  • Consistency of starter: The starter can be fed just before making these pancakes with the appropriate amount of water-to-flour ratio so that the batch looks like thick pancake batter.  I wish I had a more scientific measurement technique for you at this point.  If you are familiar with pancakes, this should be simple.  Just go with your gut instinct.
  • Yield: Depending on the hydration of your starter you'll get between 9-12 pancakes 3 inch in diameter pancakes.  I'd guesstimate that I use 1/8 of a cup of batter for each pancake.  Again, nothing too technical. 
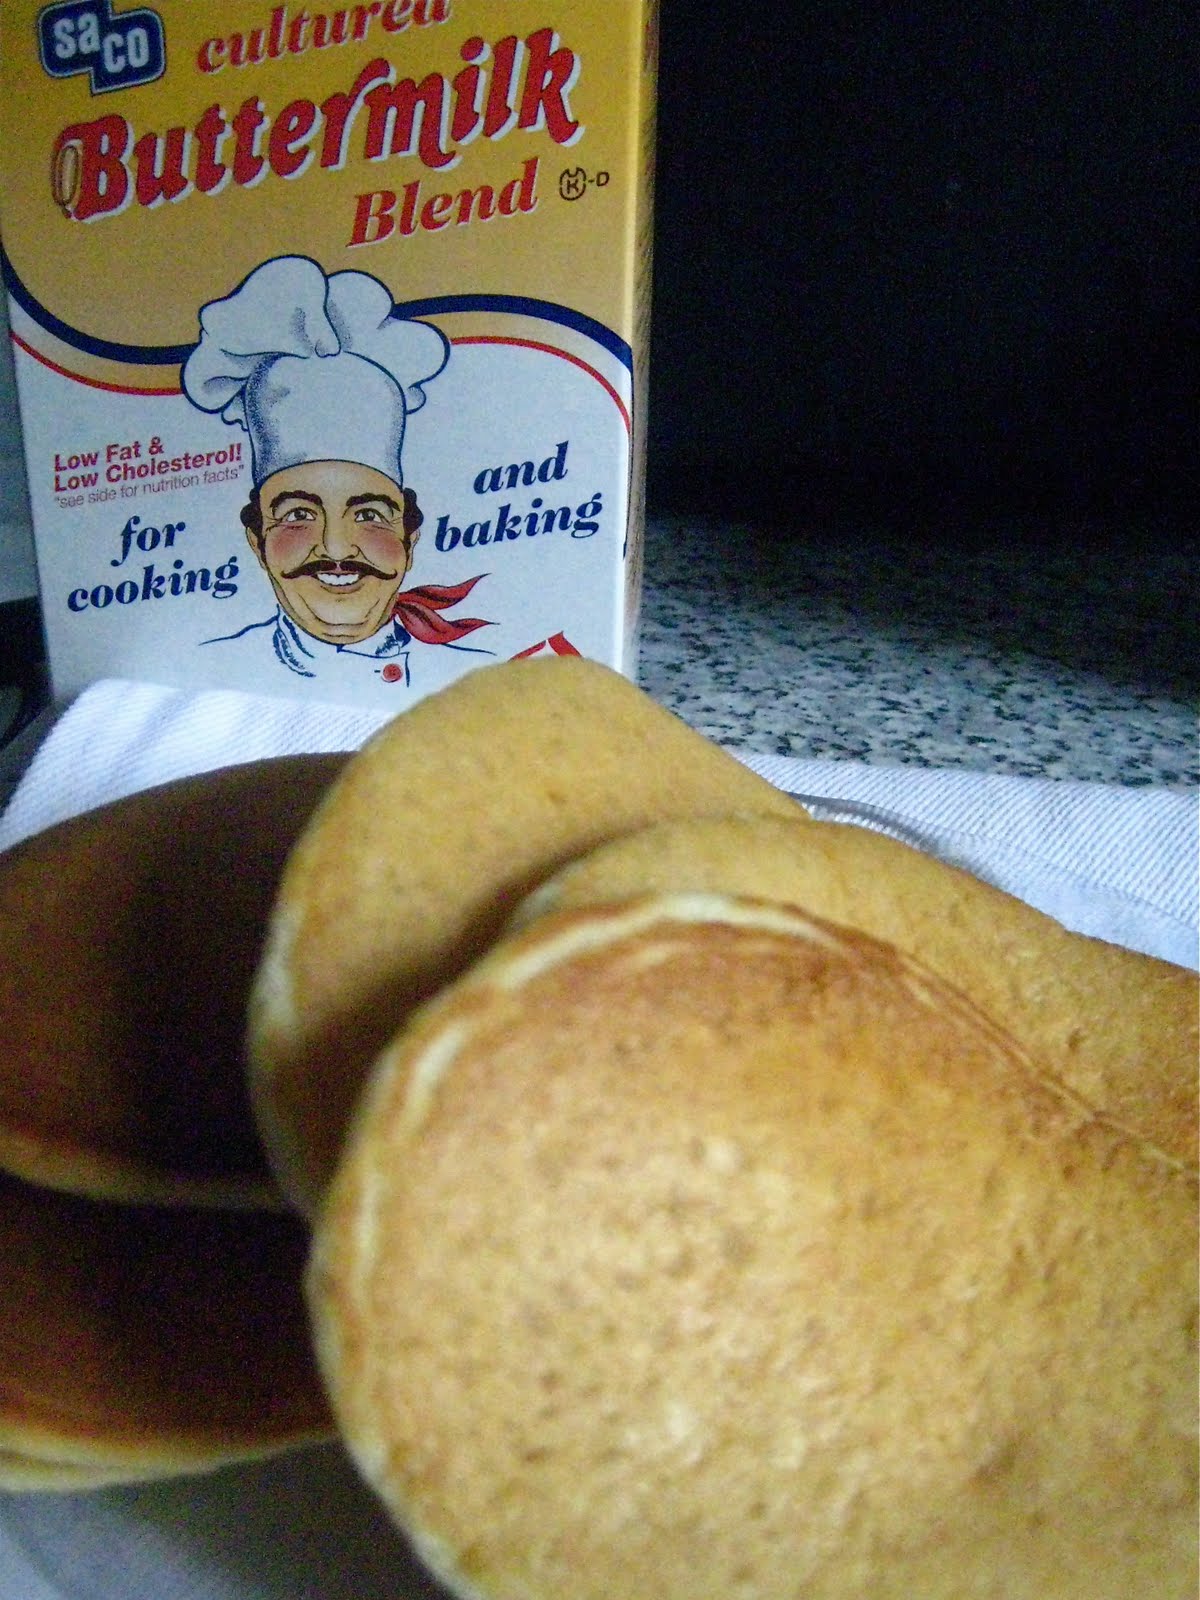
  • Buttermilk: One morning, because I am more of a mad scientist than a baker, I threw in a tablespoon of SACO Cultured Buttermilk.  It's basically powdered buttermilk.  It made the whole batter bubble and bubble and the pancakes were so airy they were practically transparent!  Since then I have been using 1/2 a tablespoon in the recipe and it gives the pancakes a light, fluffiness while maintaining their opacity.

Happy Mother's Day,
Sarah

Sunday, April 10, 2011

Carrot Cake Muffins

Andy and I just made these Carrot Cake Muffins from the NY Times.  We halved the recipe and we added in a little grated apple with our carrots for some variety.  Yum!  We are thinking a bit of cream cheese on top would make these totally decadent breakfast.  Sar

Sunday, March 27, 2011

"I like Productive Lily" - Sar

Morning's aren't really my thing.  They never have been.  My mom and I like to refer to ourselves as a pair of "night owls" -  although, somehow my mom is also awake by 7:30am most mornings, so I'm positive that is at least one trait I did not inherit from her.  I don't often see the AMs on the weekend, which is something that I'm totally fine with.  Sleep is awesome.

Yesterday morning, however, I agreed to help Sar with preparing for a birthday party for a family for which she's been a long-time babysitter.  We were in charge of putting together tea sandwiches for around 12 kids and 12 adults.  Nancy, mom-extraordinaire, had everything ready to go and had decorated the apartment for the perfect princess birthday tea party for Ma'yan, her now-four-year-old daughter.

I love party prep - even when it means waking up at 7:20am and being out the door by 8:15.  Even on a weekend.  I was ready so sacrifice some sleep to join Sar.

At Nancy's request we made:
- puzzle-shaped cucumber & cream cheese sandwiches
- jam & ricotta roll-ups
- pitettes (mini pitas) stuffed with pomegranate guacamole (which was AMAZING - who'd have thought?!)
- cream cheese, smoked salmon, & cucumber sandwiches for the adults
- cucumber, carrot, & celery spears

I had assumed I'd go home and sleep some more because, hey, it was Sunday!  But no!  All of that rolling, spreading, cutting, mixing, and chopping had really got me going.  I had morphed into Productive Lily - someone who hasn't shown her face on a weekend in God knows how long.

Productive Lily knew what she was going to do with the rest of the day - she was going to blog!

Enough of this third-person stuff...I was pumped to get baking again and had my eye on this recipe from the authors of Artisan Bread in 5 Minutes a Day.  It shows you how to make enough dough to bake 4 loaves of bread over a 2 week period by mixing a master batch and letting it hang out in the fridge - a lot like sourdough.  I went out, got a big enough container to make a 2-loaf batch of dough (that's all I could find), went grocery shopping, did the dishes twice, and cleaned my room.  Oh yeah, I also mixed together the dough.  Sar was proud to come back from yoga and find me making egg salad for lunch tomorrow.  "I like Productive Lily", said Sar.

As I said, I halved the recipe, but also made a few other changes to the flours used.  I love rye flour, and also wanted the bread to be a bit more on the whole-wheat side, so I used 1 cup rye flour, 1 cup whole wheat, and 1 1/4 cup AP flour rather than the full 3 1/4 cup AP flour that the original half-recipe called for.  Consequently, I also had to add a touch more water (maybe 1/4 cup total) to make up for all of the whole grains.

After watching the dough more than double in the required 2-hour rise period, I popped it in the fridge for another few hours.  It's definitely easier to work with cold because this is a wet dough.   I took out a 1lb hunk of dough (measured on this scale, which I'm in love with), formed a boule, and let it rise for another hour.  I slashed an X into the top and popped it in the oven.  When I took it out, it took all of my effort to tell myself I wouldn't cut into it until this morning.  Self-restraint is not my thing, so I naturally ate a warm slice and...let me tell you...this bread is THE bread.  Let's weigh the pros and cons:

Pros:
- No kneading necessary
- One batch can last you 2 weeks if you make the full recipe
- It easily adapts to be mostly whole grain
- It tastes like heaven

Cons:
- None...how had I not found this recipe earlier???  GO MAKE YOURSELF SOME DOUGH!

I enjoyed toast for breakfast and my egg salad sandwich at lunch today.  Sar and I have been known to have loaves last less than 2 days in this apartment...I'm giving this loaf 36 hours before it's finished.

Now, really, stop reading and make some bread.  You're seriously  missing out if you don't.

Here's to full-day Sundays!
<3 Lil

Monday, February 21, 2011

Oats + Sourdough making a comeback!

Lil and I have no shame in doing/buying/wearing the same things.  In fact, sometimes we go out of our way to do this... case in point: yesterday we went to Sephora to purchase the exact same makeup and the to Urban Outfitters and bought the same flannel dress.  In high school we had a tradition of buying a matching pair of flip flops every summer.  Whenever I discover a way that Lil does something differently than I might I make sure to state, "That's how we are different."  The instances where I use this phrase are few and far between but it's important to note them when they do come up just so that we remember that we are, in fact, different people.

It should come as no shock that we have baked the same loaf of bread on separate occasions.  Remember the Sourdough Oat Bread I made a while back?  The loaf of Oat Bread that Lil made most recently comes from the same cookbook (Good to the Grain) just without the sourdough kick.

In the repetition of baking those loves I noticed a pattern.  The oats were visible (little white flecks) but not detectable in terms of texture/taste.  They didn't bother me at all except aesthetically.  So, I thought why not try the recipe again and soak the oats before hand?  I put the cup of oats into about 1 1/2 cups water and let it be for about 5 hours.  Then, I proceeded with the recipe.  It was a delicate balance to find the right moisture level since I had the wet starter and the wet oats. In the end I got it.  Or so I thought...


But look.. No white oats visible in the bread.  Success!


They are only on the crust where I sprinkled them just before baking.  Beautiful.  Almost... see how the upper right side of the bread is sort of.  Um.  Droopy?  Yeah, droopy.  Welllllllll I don't know how to explain this except to say that my loaf pooped.


The side of the bread fell off and onto the stained oven stone below.  I have no idea why this happened. In the oven of all places?!  I would have thought if it would happen it would have fallen off during it's second rise.  My best guess is that the dough was still a bit too wet and fell off because it was too heavy.  

Regardless, this bread makes a great breakfast spread with peanut butter, jam, or avocado.  

Sourdough loves Oats (soaked).

Oh, and what became of the little dookie I found on the oven stone?  I ate it.
-Sar

PS Lil and I are staging a comeback from our beginning of February blues.  The new Amazonian illuminating clay serum and flannel dresses are just the beginning.  Watch out.

Thursday, February 3, 2011

"If you try sometimes, you just might find you get what you knead"


February has been a rough month thus far for Sar and I - I know, it's only the 3rd, but a lot can happen in 3 days.  The gist of it is that my beloved kitty cat that I've had since I was 4 (which means he's 20 years old) has kitty lymphoma and is not going to make it much longer.  Reality bites, as they say, and I'm pretty sad about it.  Poor Sar also had a trauma yesterday: one of her 7-year-old students accidentally shot a small toy into her open eye, which resulted in a pretty painful injury from which she is recovering - hopefully quickly.  Needless to say, we're a little depressed given our current circumstances.

Now, this post isn't going to be a sad one - I just wanted to give you some background into why this loaf needed (kneaded) to be particularly wonderful.  Sar and I probably couldn't take another disappointment.  Luckily, this was one of the most successful sandwich loaves I've baked - it's comforting to think how something as simple as a perfect loaf of bread can lift my spirits.  The 15 minutes of kneading was also a pretty great way to work out some feelings...and my triceps...just sayin'.

The recipe I used was my own adaptation of Allison and Son of White on Rice Couple's adaptation of Good to the Grain's Whole Wheat Oatmeal Sandwich Loaf.  I won't re-post the whole recipe, as Allison & Son do a great job of it on their blog, but I replaced the bread flour (of which we ran out a while ago) with a mixture of 1 cup light rye flour, 1 cup oatmeal flour, and 1 tablespoon of vital wheat gluten.  I didn't replace the full 2 1/2 cups since both of these flours are whole grain, and whole grains soak up more liquid than non-whole grain flours.  I did end up needing to add about 1/4 to 1/3 cup all-purpose flour as I kneaded in order to get the dough to the right texture.  It worked out beautifully.

I made this loaf starting at 8pm, so you can imagine that the lighting in our kitchen was less-than-ideal for photography, so here are a very few, badly lit pictures:
 
Although it rose perfectly in the pan in under an hour, I was still not convinced that this was a good sign.  I've had a ton of loaves rise perfectly to this point, and then just stop rising entirely when they get put in the oven...


...but WOW did this guy rise.  I was so happy.

My mom will be happy to know that this turn of events reminded me of a song she would always sing to me when I was little and being particularly annoying and asking for a zillion things that I couldn't have: "You can't always get what you want" made it seem like the Rolling Stones had made a song just to give my mother ammo against my begging and pleading for extra TV time or whatever it was that I was begging for at the moment.  But they were right - "If you try sometimes, you just might find you get what you need".  I really needed a win, and this loaf was a definite winner.  Silly as that sounds.

The morning light was a bit better, so these pictures aren't quite as awful as the previous ones.  This bread toasts beautifully, makes a fabulous sandwich, and is all-around fantastic.  It was the perfect pick-me-up breakfast.


Here's to getting just what you need - big or small.

-Lil

Friday, January 28, 2011

SOURDOUGH Pumpkin Raisin Muffins

For these muffins I used the Pumpkin-Cranberry Muffins from Versatile Vegetarian Kitchen.  I made some minor modifications...

Some spices (cinnamon, nutmeg, cloves, ginger) in with the dry ingredients.

Raisins instead of cranberries.

And some sprinkled sugar in the raw on top.  

They rose beautifully.  The sourdough is happy again.

Sometimes I get a minor sourdough aftertaste but other than that they taste like a pumpkin-y, raisin-y, sweet hearty muffin.

Looking forward to breakfast (as always),
Sarah

Saturday, January 22, 2011

Rustic Sourdough

Our sourdough did not have a very happy end to 2010 or beginning to 2011.  While everybody was off on their winter vacations our sourdough got very, very neglected.  A while back we had frozen the sourdough before we went on vacation and learned not to bake with the batch out of the freezer but to feed and discard at least once.  This time around we did not plan so wisely.  Left the sourdough to fend for itself in the fridge.  And wow.  The sourdough got upset.

I have been nursing it back to health for the past month and I am ready to let it go wild in this KAF Recipe.  I modified it a bit by adding 2 cups whole wheat flour in place of the all purpose.  I only ended up needing about 4 cups of flour total (since whole wheat sucks up more liquid).  I also added 4 teaspoons of vital wheat gluten for fun.  I baked a bit longer than 30 minutes - closer to 40 - because I only did one big boule on the stone:

And it grew up to be a beautiful,

delicious, round loaf.

One of my New Year's resolutions is to treat the sourdough starter with the love and respect it deserves.  We're off to a good start.

XO,
Sarah

PS It turns out my signature baking move is dusting with wheat germ.  Those are the specks you see on top.  Makes a great upper crust.

Monday, January 17, 2011

Bagels for Dinner (and Breakfast and Lunch)


This is a follow-up to our Bagels for Dinner post.  I woke up and just NEEDED to make the bagels using more of the CD Kitchen technique that we linked to last night.  I modified the recipe a bunch, so I'll post my version for you to try.  Since we already posted about 100 pictures of what each step looks like, I'll save you the details of the process, but you've got to admit, these are some beautiful bagels. 


In comparison to our original bagels, they were larger (the recipe made 8, not 10), sweeter (molasses was both in the dough and in the poaching water), and rose more (due to the added sugar - yeast really has a sweet tooth).  

Bread Alone's bagel vs. our CD Kitchen adaptation
I prefer this recipe to the first, but can definitely appreciate what we learned making the first batch and am glad that we used Bread Alone as our guide.  While molasses made a pretty solid substitute for  malted barley syrup (or "balt" when Sar and I are saying it quickly without realizing...), I still think the malted flavor would make the bagels feel more authentic.  After all this work, I can definitely appreciate the effort that goes into making bagels at H&H and other New York delis.  They're probably not doing it all by hand, like us, but it's still quite a process.

Bagels
Makes 8 small-to-average sized bagels
Recipe adapted from CD Kitchen

Dough
1 1/2 cup warm water
1 tablespoon dry active yeast
1 tablespoon sugar (we only have Sugar in the Raw left and it worked wonderfully)
1 tablespoon vegetable oil
1 tablespoon molasses (unsulfered)
2 teaspoons salt
1 cup whole wheat flour
2-3 cups unbleached all-purpose flour
4 tablespoons vital wheat gluten


Poaching Liquid
3 quarts water
2 tablespoons molasses
1/2 teaspoon salt


Toppings (optional, but highly suggested)
Egg-white (to use as glue for toppings)
Toasted sesame seeds
Dried minced onion
Poppy seeds
Wheat germ
Flax seeds


Steps:
1) Combine yeast, sugar, and water.  Allow to sit for 5-7 minutes until frothy.
2) Add whole wheat flour and combine.  Add 2 cups of the white flour, mix thoroughly, and turn onto a well floured surface.
3) Knead in the remaining flour as needed (dough should be smooth and elastic as you knead - not dry at all), and knead for 12-15 minutes.
4) Allow dough to rest for 15 minutes covered by a clean towel or plastic wrap.
5) Divide dough into 8 or 10 portions, roll each portion into a ball, poke a hole in the middle of the ball, and twirl it around your finger to stretch out the hole.  Note: I've found that making them into rings this way is far more successful, fun, and less tedious than rolling the dough into ropes and trying to stick the ends together to make a ring.
7) Pre-heat the oven to 425 degrees F.
6) Allow shaped rings to rest on parchment paper for 15-20 minutes until they've puffed up a bit.  In the meantime, combine the ingredients for the poaching liquid and get it boiling.  Reduce down to a simmer before poaching the dough.
7) Once the dough rings are puffy, drop them into the simmering liquid and poach for 30 seconds on each side.  Drain poached bagels on drying racks lined with paper towel.
8) Use a pastry brush to paint the egg-white over each bagel and top it with whichever toppings you've chosen.  Or just pop them into the oven plain.  This is something we'd never do, but we don't judge.
9) Bake the bagels on the center rack for 20 minutes, turning the sheet around in the oven at 10 minutes to ensure that they cook evenly.  We had to cook ours in two batches, but you may be able to fit them all into a large oven.
10) Allow to cool briefly and enjoy with eggs and cheese, cream cheese, butter, or just as-is, which is pretty awesome, too.


Next up for New York themed goodies is the bialy - or "broigel", if you're Emily A. Gafney.

Now go carbo-load, because you know we have been.

Love,
Lily

Sunday, January 16, 2011

Bagels for Dinner


Bagels for dinner!  Really...what could be better?  Only one thing - homemade bagels for dinner, that's what.  Last evening we had a pretty standard Saturday:  we went out to sushi for dinner with good friends, met up with some more friends for drinks, a cab ride back uptown, delicious pizza at 2am, and a long night's sleep.  Something that goes along with a standard Saturday is a standard Sunday - being tired, lazy, and perpetually hungry.

We have not been able to stop eating today.  We both knew we wanted bagels, but we wanted to make them...so bagels for dinner it is.  We found a pretty straight-foward looking recipe in Bread Alone by Daniel Leader and Judith Blahnik.  Since we're not bagel aficionados, we followed their recipe to the T, minus the one ingredient we couldn't get our hands on (malted barley syrup).  If anyone knows a good place to find this stuff, let us know!

Making these bagels was a real learning experience.  Bread Alone is a great reference for learning the basics of baking.  It has a scientific formula for the temperature of dough and ingredients.  The ideal temp is 74-80 degrees.  Too cold and it won't rise fully.  Too warm and it will over ferment.  So, very important to mix your dough in this range.  The gist of it is that Dan and Judy give a formula for figuring the temperature the water should be based on the other ingredients and the room.  Fun fact: for every minute you knead dough the dough temperature goes up one degree.  The friction factor.  We really kneaded vigorously:


Once the dough was smooth and elastic, we kept kneading for the required 15 minutes more.  After that was all over and done with, and we both had biceps large enough to flip small SUVs, we balled the dough up and took its temp.


It was a little warm, so we made sure to keep it covered in a not-so-hot part of the kitchen.  After it sat for an hour and a half and Sar and I watched the latest SNL episode, the dough looked full and beautiful.  We deflated it and cut it into 10 equal-ish sized balls.


Once the balls rested, they got shaped into the classic bagel ring, rested some more, and boiled.  We used 1 tablespoon of baking soda in place of the malt syrup, and we missed the sweetness that the syrup would have given the bagels.  The baking soda wasn't bad, though.


Poaching jump-starts the yeast's action and the bagels really puffed up while they were drying off:


They got an egg-wash:


And then got sprinkled with poppy seeds, sesame seeds, flax seeds, dried minced onion, coarse salt, wheat germ, or some combination thereof.


While the bagels baked, we whipped up some scallion cream cheese by stirring 1/3 cup of finely chopped scallions into 1 block of softened neufchatel cheese.


We took a lovely picture of the scallions mid-chop while the sun was still pouring into the kitchen.  It would be a shame not to share.


The final bagels were delicious with the cream cheese, as well as with cheesy eggs - we both had two.


We highly recommend Bread Alone for any baker - novice to experienced.

Recommendations:
Turning bagels around in the oven
Adding 1 tablespoon of whatever sweetener you choose to the dough (this recipe doesn't call for any); whether it's the malted barley syrup, molasses, honey, or simply brown sugar
Slightly less salt in the dough - the recipe calls for 1 tablespoon, but 2 or 3 teaspoons may be enough

This recipe at CD Kitchen looks great - we'll definitely let you know how it compares to Bread Alone's recipe, if we get a chance to make them, too.

Enjoy MLK Day off (or not)!
Lil & Sar

Wednesday, January 12, 2011

Banana Cereal Muffins

So, Lil set me up for this by mentioning the four bananas in the freezer.  This recipe only (only?!) uses three.  It's a good followup to the Anadama bread because there is also a stovetop element to this one.

I adapted this recipe from a cookbook the lovely Emeric Harney gifted our bread efforts.  You can find Good to the Grain by Kim Boyce with Amy Scattergood at the new Harney & Sons tea shop in Soho (on Broome by Crosby).

Fair warning: this recipe calls for a half cup cooked hot cereal but asks you to start with a half cup dry and cook it.  What I am telling you is that you'll end up with some extra cereal.  Either plan your breakfast accordingly or put it in the fridge and warm for tomorrows breakfast.


Banana Cereal Muffins adapted from Good to the Grain by Kim Boyce
(Printable Recipe)
Yields 15 muffins
Prep time 30 minutes
Bake time 35-40 minutes

1/2 cup cracked-multigrain hot cereal (I used Bob's Red Mill 10 grain)
pinch of salt
1 cup rye flour
1 cup oat flour
1 1/2 teaspoons baking powder
1/2 teaspoon baking soda
1 teaspoon salt
1 teaspoon cinnamon
6 tablespoons yogurt (I used fat free French Vanilla because that's what we had around)
1/4 cup brown sugar
3 very ripe bananas
2 tablespoons unsulphured molasses
1 egg

1. Bring 1 1/2 cups of water to a boil on the stovetop.
2. Add 1/2 cup of hot cereal and pinch of salt.  Whisk to avoid clumping.
3. Simmer uncovered, stirring occasionally until the cereal is tender (about 15 minutes).  Cover and let sit until cool.
4. Preheat the oven to 350 and butter your muffin tins.
5. Combine the dry ingredients.
6. In a separate bowl, mix together the sugar and yogurt with a hand mixer or other electronic if you have it.  Mix for about two minutes until it's really combined.
7. Add in the cereal, bananas, molasses and egg and mix thoroughly (about one more minute).
8. Add dry ingredients and continue to mix.
9. Fill muffin tins to the rim for a nice dome top.  Optional: Sprinkle with wheat germ and sugar in the raw.  And, about halfway through filling add chopped pecans to the batter and on on top for some plain some banana-pecan cereal muffins!
10. Bake for 35-40 minutes turning halfway through for even baking.

Delicious warm from the oven! I am eating one as I type with one hand..

 That one.

Happy Snow Day!
Sarah

Tuesday, January 11, 2011

Anadama Bread...is it as fun to eat as it is to say?


Dear Readers,

First and foremost, HAPPY 2011!  I hope your holidays were fantastic.  Mine certainly were.

Now, onto the next order of business:  Please don't abandon Sar and I, although we understand if you feel as if we've abandoned you.  You see, work has picked up for both Sarita and I and we've been dining on our frozen loaves.  Those frozen loaves are now gone and it's time to get serious about bread baking...and blogging.  

I got home from work this evening and thought - I'm going to make Anadama bread.  This bread supposedly originated in Massachusetts and the name is derived from a farmers' exclamation to his wife: "Anna! Damn 'er!"  I'm telling you that story from memory and can't recall why the farmer was so upset with his wife, but I doubt it was because she was making him delicious loaves of slightly sweetened bread.

I've been seeing this type of bread pop up on TasteSpotting and other food blogs that I follow, and today is the day The Upper Yeast Side joins the fun.  I used the recipe posted by Margaret Polaneczky at The Blog That Ate Manhattan back in 2008 (recipe link here).  I picked this recipe to use since I have a thing for supporting fellow bloggers AND it calls for honey in place of molasses.  I absolutely adore molasses...probably more than most people....but Sar and I have about a half-gallon of honey to use and there's only so much honey you can add to tea, PB sandwiches, and pour over biscuits.  *Actually, I could probably finish that honey by myself by pouring it over biscuits...but that is no way to trim down after all of the Hannukah/Christmas/New Years/Birthday indulging I've recently been involved in.*

This bread was pretty fun to make - it has a stovetop element, which makes it feel like you're cooking...not just baking.   The cornmeal gets boiled along with water, honey, and butter.  This makes something pretty similar to grits, as I understand them...and the resulting porridge is DELISH.  I admit to eating a spoonful or two.


Once you've cooled the porridge to luke-warm, you mix in proofed yeast, salt, and the flour (whole wheat and all-purpose).  Knead, knead knead, and then rise the dough 'til doubled.  Once it's doubled, you knead a bit more, split it in half, and plop it into two bread pans.  Let it rise again until doubled once more and it's time to bake.

I rose my dough in front of my little space heater to ensure that it didn't take a year-and-a-half to double in our wintry apartment.  It looked so cute all tucked in during the second rise that I just had to snap a picture:


They rose beautifully before going into the oven:


...Not so much rising happened in the oven, but I assure you, the bread is delicious anyway.  I tasted the first slice with some butter and it was magical.


Anadama bobana bananafana fofama me mi momamma...anadama!

Speaking of bananas - we have 4 frozen in the freezer (imagine, frozen things in the freezer!!?).  Banana goodies up next?  Yep, I'd say that's a fair guess.

- Lil

PS - today Sar and I laid our herbs to rest in the 2nd floor compactor of our building.  It wasn't easy, but the herbs were dead - had been dead for a while - and our lettuce leaves were recently eaten by mice (*#!%in' mice...).  The basil lived a long life of climbing tall and producing few to no leaves...apparently it was starved for sunlight.  South-facing windows were not enough for that guy.   


The oregano once was so strong and healthy that it looked as if it might grow over our entire apartment and choke me in the night.  It promptly died of unknown causes.  I never really liked oregano, though, so I don't think I'll miss it too much.  I'm innocent - I swear.