Sunday, January 16, 2011

Bagels for Dinner


Bagels for dinner!  Really...what could be better?  Only one thing - homemade bagels for dinner, that's what.  Last evening we had a pretty standard Saturday:  we went out to sushi for dinner with good friends, met up with some more friends for drinks, a cab ride back uptown, delicious pizza at 2am, and a long night's sleep.  Something that goes along with a standard Saturday is a standard Sunday - being tired, lazy, and perpetually hungry.

We have not been able to stop eating today.  We both knew we wanted bagels, but we wanted to make them...so bagels for dinner it is.  We found a pretty straight-foward looking recipe in Bread Alone by Daniel Leader and Judith Blahnik.  Since we're not bagel aficionados, we followed their recipe to the T, minus the one ingredient we couldn't get our hands on (malted barley syrup).  If anyone knows a good place to find this stuff, let us know!

Making these bagels was a real learning experience.  Bread Alone is a great reference for learning the basics of baking.  It has a scientific formula for the temperature of dough and ingredients.  The ideal temp is 74-80 degrees.  Too cold and it won't rise fully.  Too warm and it will over ferment.  So, very important to mix your dough in this range.  The gist of it is that Dan and Judy give a formula for figuring the temperature the water should be based on the other ingredients and the room.  Fun fact: for every minute you knead dough the dough temperature goes up one degree.  The friction factor.  We really kneaded vigorously:


Once the dough was smooth and elastic, we kept kneading for the required 15 minutes more.  After that was all over and done with, and we both had biceps large enough to flip small SUVs, we balled the dough up and took its temp.


It was a little warm, so we made sure to keep it covered in a not-so-hot part of the kitchen.  After it sat for an hour and a half and Sar and I watched the latest SNL episode, the dough looked full and beautiful.  We deflated it and cut it into 10 equal-ish sized balls.


Once the balls rested, they got shaped into the classic bagel ring, rested some more, and boiled.  We used 1 tablespoon of baking soda in place of the malt syrup, and we missed the sweetness that the syrup would have given the bagels.  The baking soda wasn't bad, though.


Poaching jump-starts the yeast's action and the bagels really puffed up while they were drying off:


They got an egg-wash:


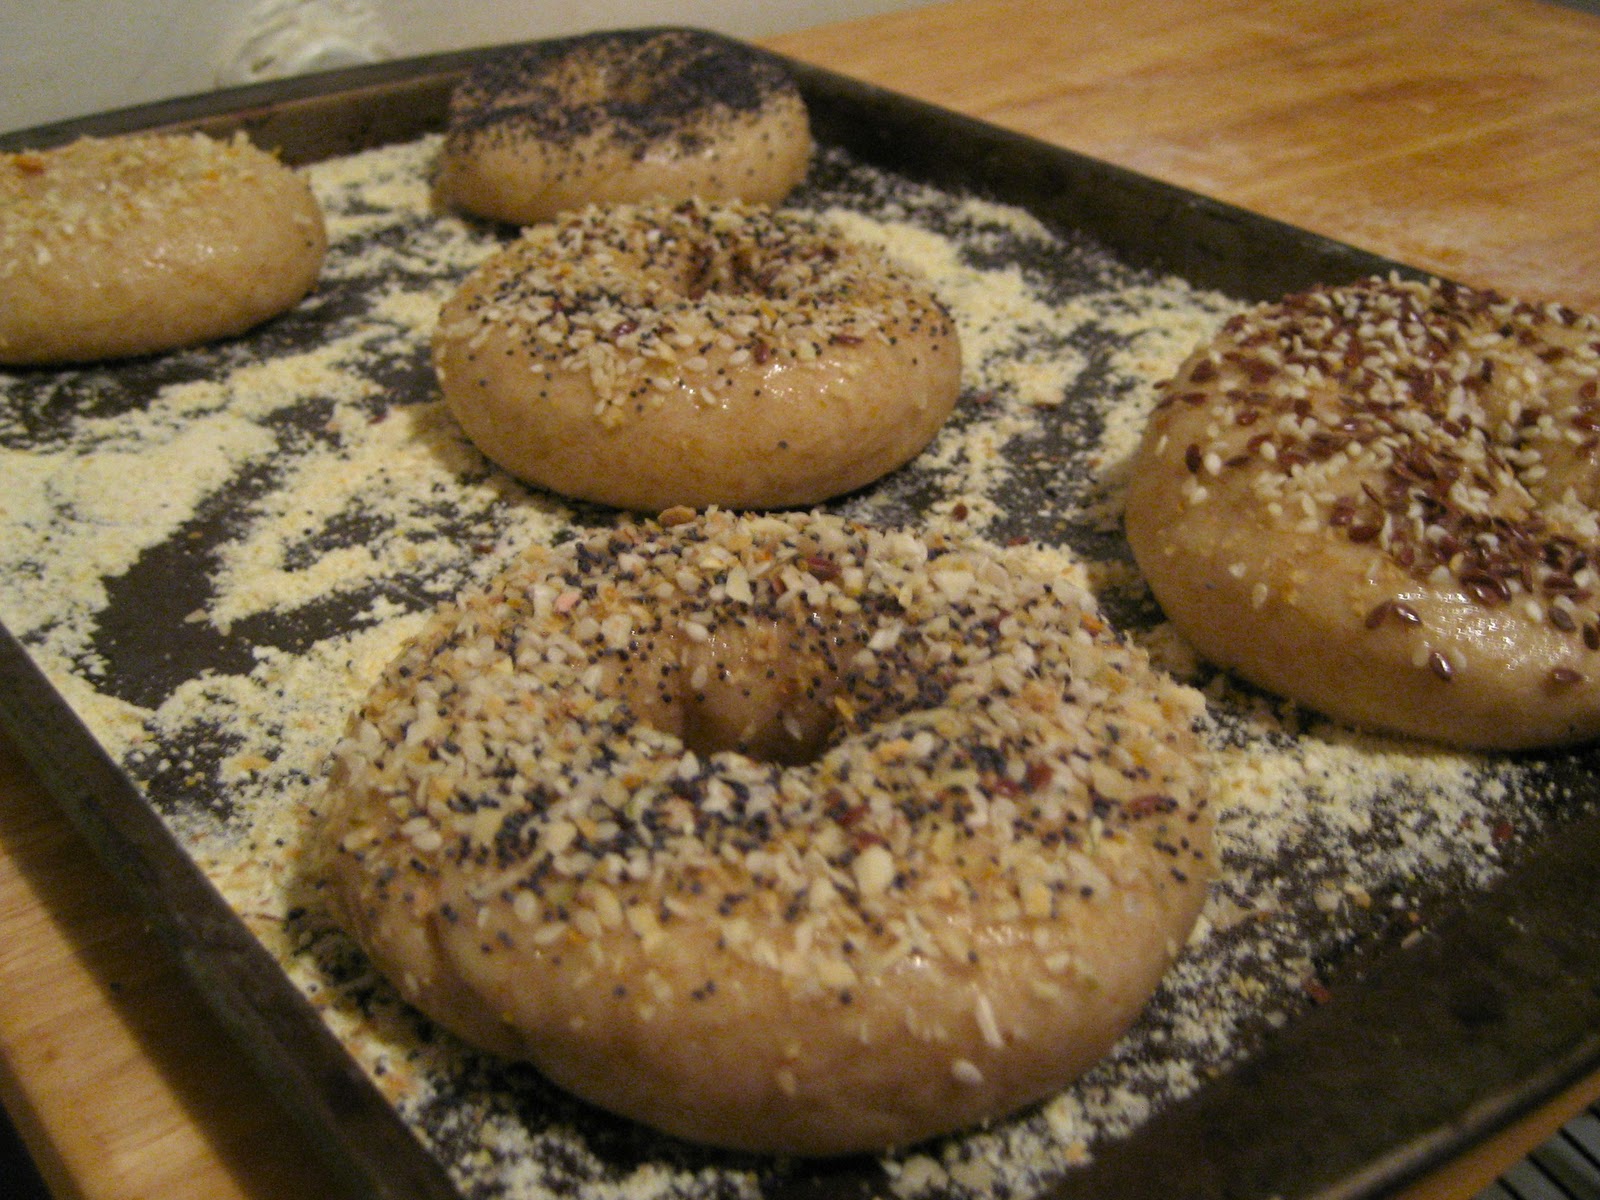
And then got sprinkled with poppy seeds, sesame seeds, flax seeds, dried minced onion, coarse salt, wheat germ, or some combination thereof.

While the bagels baked, we whipped up some scallion cream cheese by stirring 1/3 cup of finely chopped scallions into 1 block of softened neufchatel cheese.


We took a lovely picture of the scallions mid-chop while the sun was still pouring into the kitchen.  It would be a shame not to share.


The final bagels were delicious with the cream cheese, as well as with cheesy eggs - we both had two.


We highly recommend Bread Alone for any baker - novice to experienced.

Recommendations:
Turning bagels around in the oven
Adding 1 tablespoon of whatever sweetener you choose to the dough (this recipe doesn't call for any); whether it's the malted barley syrup, molasses, honey, or simply brown sugar
Slightly less salt in the dough - the recipe calls for 1 tablespoon, but 2 or 3 teaspoons may be enough

This recipe at CD Kitchen looks great - we'll definitely let you know how it compares to Bread Alone's recipe, if we get a chance to make them, too.

Enjoy MLK Day off (or not)!
Lil & Sar

Wednesday, January 12, 2011

Banana Cereal Muffins

So, Lil set me up for this by mentioning the four bananas in the freezer.  This recipe only (only?!) uses three.  It's a good followup to the Anadama bread because there is also a stovetop element to this one.

I adapted this recipe from a cookbook the lovely Emeric Harney gifted our bread efforts.  You can find Good to the Grain by Kim Boyce with Amy Scattergood at the new Harney & Sons tea shop in Soho (on Broome by Crosby).

Fair warning: this recipe calls for a half cup cooked hot cereal but asks you to start with a half cup dry and cook it.  What I am telling you is that you'll end up with some extra cereal.  Either plan your breakfast accordingly or put it in the fridge and warm for tomorrows breakfast.


Banana Cereal Muffins adapted from Good to the Grain by Kim Boyce
(Printable Recipe)
Yields 15 muffins
Prep time 30 minutes
Bake time 35-40 minutes

1/2 cup cracked-multigrain hot cereal (I used Bob's Red Mill 10 grain)
pinch of salt
1 cup rye flour
1 cup oat flour
1 1/2 teaspoons baking powder
1/2 teaspoon baking soda
1 teaspoon salt
1 teaspoon cinnamon
6 tablespoons yogurt (I used fat free French Vanilla because that's what we had around)
1/4 cup brown sugar
3 very ripe bananas
2 tablespoons unsulphured molasses
1 egg

1. Bring 1 1/2 cups of water to a boil on the stovetop.
2. Add 1/2 cup of hot cereal and pinch of salt.  Whisk to avoid clumping.
3. Simmer uncovered, stirring occasionally until the cereal is tender (about 15 minutes).  Cover and let sit until cool.
4. Preheat the oven to 350 and butter your muffin tins.
5. Combine the dry ingredients.
6. In a separate bowl, mix together the sugar and yogurt with a hand mixer or other electronic if you have it.  Mix for about two minutes until it's really combined.
7. Add in the cereal, bananas, molasses and egg and mix thoroughly (about one more minute).
8. Add dry ingredients and continue to mix.
9. Fill muffin tins to the rim for a nice dome top.  Optional: Sprinkle with wheat germ and sugar in the raw.  And, about halfway through filling add chopped pecans to the batter and on on top for some plain some banana-pecan cereal muffins!
10. Bake for 35-40 minutes turning halfway through for even baking.

Delicious warm from the oven! I am eating one as I type with one hand..

 That one.

Happy Snow Day!
Sarah

Tuesday, January 11, 2011

Anadama Bread...is it as fun to eat as it is to say?


Dear Readers,

First and foremost, HAPPY 2011!  I hope your holidays were fantastic.  Mine certainly were.

Now, onto the next order of business:  Please don't abandon Sar and I, although we understand if you feel as if we've abandoned you.  You see, work has picked up for both Sarita and I and we've been dining on our frozen loaves.  Those frozen loaves are now gone and it's time to get serious about bread baking...and blogging.  

I got home from work this evening and thought - I'm going to make Anadama bread.  This bread supposedly originated in Massachusetts and the name is derived from a farmers' exclamation to his wife: "Anna! Damn 'er!"  I'm telling you that story from memory and can't recall why the farmer was so upset with his wife, but I doubt it was because she was making him delicious loaves of slightly sweetened bread.

I've been seeing this type of bread pop up on TasteSpotting and other food blogs that I follow, and today is the day The Upper Yeast Side joins the fun.  I used the recipe posted by Margaret Polaneczky at The Blog That Ate Manhattan back in 2008 (recipe link here).  I picked this recipe to use since I have a thing for supporting fellow bloggers AND it calls for honey in place of molasses.  I absolutely adore molasses...probably more than most people....but Sar and I have about a half-gallon of honey to use and there's only so much honey you can add to tea, PB sandwiches, and pour over biscuits.  *Actually, I could probably finish that honey by myself by pouring it over biscuits...but that is no way to trim down after all of the Hannukah/Christmas/New Years/Birthday indulging I've recently been involved in.*

This bread was pretty fun to make - it has a stovetop element, which makes it feel like you're cooking...not just baking.   The cornmeal gets boiled along with water, honey, and butter.  This makes something pretty similar to grits, as I understand them...and the resulting porridge is DELISH.  I admit to eating a spoonful or two.


Once you've cooled the porridge to luke-warm, you mix in proofed yeast, salt, and the flour (whole wheat and all-purpose).  Knead, knead knead, and then rise the dough 'til doubled.  Once it's doubled, you knead a bit more, split it in half, and plop it into two bread pans.  Let it rise again until doubled once more and it's time to bake.

I rose my dough in front of my little space heater to ensure that it didn't take a year-and-a-half to double in our wintry apartment.  It looked so cute all tucked in during the second rise that I just had to snap a picture:


They rose beautifully before going into the oven:


...Not so much rising happened in the oven, but I assure you, the bread is delicious anyway.  I tasted the first slice with some butter and it was magical.


Anadama bobana bananafana fofama me mi momamma...anadama!

Speaking of bananas - we have 4 frozen in the freezer (imagine, frozen things in the freezer!!?).  Banana goodies up next?  Yep, I'd say that's a fair guess.

- Lil

PS - today Sar and I laid our herbs to rest in the 2nd floor compactor of our building.  It wasn't easy, but the herbs were dead - had been dead for a while - and our lettuce leaves were recently eaten by mice (*#!%in' mice...).  The basil lived a long life of climbing tall and producing few to no leaves...apparently it was starved for sunlight.  South-facing windows were not enough for that guy.   


The oregano once was so strong and healthy that it looked as if it might grow over our entire apartment and choke me in the night.  It promptly died of unknown causes.  I never really liked oregano, though, so I don't think I'll miss it too much.  I'm innocent - I swear.


Monday, December 27, 2010

Mark Bittman's crackers

Who needs Christmas cookies?  Christmas crackers!


Read the article and the recipe also. 

FYI the crackers stayed on the table all night.  Some Christmasers who were able to resist the biscotti, the cupcakes, and the homemade wine kept going back for more and more crackers. I made some variations with about 1/4 cup whole wheat flour, cheddar cheese, and garlic.

Merry Christmas and Happy Nor'easter,
Sarah

Sunday, December 12, 2010

Sourdough Olive Bread II

The first time we made Sourdough Olive bread it wasn't so....


flat.  On record, no knead loaves should look a little bit wetter.  This was a crisis/disaster/emergency loaf that ended up delicious.  This rave review coming from the girl who thinks olives taste like slugs.  So you know it was really a good one.  

This was the second attempt.  I hardly wrote anything down but this is basically what happened:

We used...
2 cups whole wheat flour
1/2 cup wheat germ
1 cup bread flour
2 cups sourdough starter
1 cup water
1 cup olives
3/4 cup olive water (because it was just salty/olive-y water)
maybe another whole cup of all purpose when we kneaded...
cornmeal for the dutch oven

We...
1.  Put the flours, liquid and starter together.  
2. Waited 20 minutes.
3. Folded in sat and olives.
4. Left it covered for 12+ hours.  Went out to Indian, Ben and Jerry's for dessert.
5. The next morning we took it out.  Discovered it's a little too wet and folded in some flour:

6. Placed it on a baking stone to rise for another two-three hours.   
7. Came home from a date at Harney SoHo and find this:


Wannabe pizza??!  Not on our watch!  We popped that bubble in the front-center and transfered it carefully to the dutch oven where it had to become a boule.  We turned the oven on it's lowest setting to get a pre-spring oven spring going and then turned it up to 450 for about 45 minutes until the center temperature was 200degrees.  

I have no photograph of the final loaf because it's too delicious to photograph.  Also, it's raining and the light in the apartment right now would do this boule no justice.  Excuses excuses.

Olive you,
Sarah